An inside look at the design process
Have you ever wondered how a project goes from a dream or idea to a reality? It all comes down to a carefully practiced design process. Whether big or small, a single bathroom or an entire home, our design process has helped countless clients envision their home in a whole new way. It helps speed up decision making as well as provide a plan for your project that takes it from start to finish. Here’s an in-depth look with a recent project as your guide.
Step 1: Meet and measure
This is where we get to know you either virtually or in-person in your space to discuss your needs and wants. Photos and measurements are taken of the space and any floor plan adjustment needs are discussed. We go through your goals and dreams while getting all the technical info squared away. We’ll also ask you for any inspirational images such as on Pinterest and have you take a couple of quick surveys to guide the design.
Step 2: The floor plan
Not much can happen until we know the floor plan. This can be a more involved process to readjust walls and reconfigure entire spaces, or it can simply be a rearrangement of furniture or cabinetry. A good floor plan takes into account the use of the space as well as how traffic flows. The floor plan becomes the foundation for the furniture plan and lighting plan as well. Our floor plans are used by contractors every day and are the guiding light throughout the project.

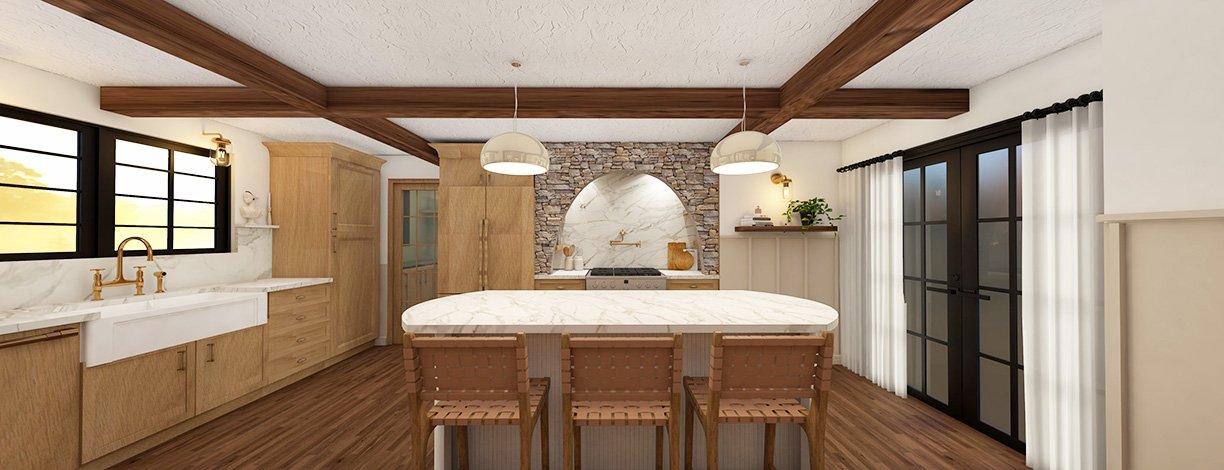
In the case of this project, we reoriented this kitchen to better maximize the space. An unused bay window is removed for French doors to a patio, and a cased opening is built out from the dining to the kitchen for a more traditional look. This floor plan gives the sink a good view and emphasizes the range as a focal point, which comes to fruition in the renderings.
Step 3: The mood board
The first step in visualizing the project comes from the mood board. This is where all the elements first come together. Often a mixture of inspiration photos, textures, colors, and actual pieces, the mood board gives you the feel – the vibe – before you even set foot in the space.
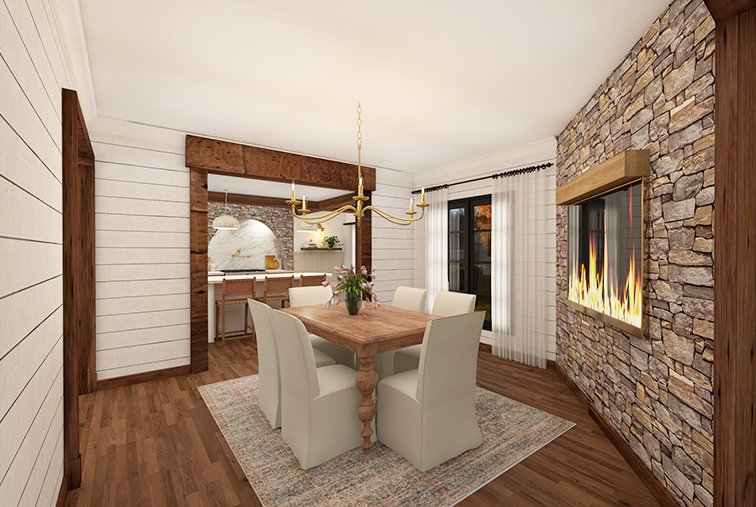
For this project, the client was interested in rustic traditional look. The wood cabinetry and bold marble will give this space a timeless but elegant feel. The brass touches and heritage colors give it that old world look, while the stone accents compliment other stonework already in the home. A rounded island is the surprise of the design while playing off the arched stone range nook. Furniture completes the look and gives a feel for how the space will come together.

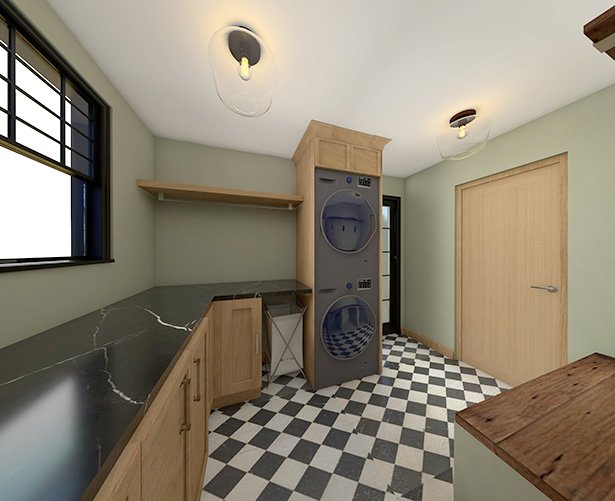
Step 4: The renders
Thankfully, technology today allows us to show you what your space will look like before it’s even built. Together with the floor plan, mood board, and initial material choices, we can construct what your space will look like in 3D. The renders make the project feel more real, allowing you to see it and believe it.
For this project, we rendered three connecting rooms so the client can see how they will all play off one another. The result is an overall cohesive feel with country cottage and farmhouse touches.
Step 5: The build
After any design edits are resolved, we price out all the materials, finishes, fixtures, and furniture, and it’s time to get the contractor scheduled. We’ll prepare a project book to keep everything on track and on budget as much as possible, giving you greater peace of mind.
Stay tuned for more on the project shown in this blog. This is just the beginning!